Getting started with Terraform with AWS2-Wrap
- Rebecca Boardman

- Nov 18, 2020
- 4 min read
Updated: Jan 25, 2021

This weeks blog post is all about terraform! What is terraform? Well, Terraform allows you to write infrastructure as code. Say you need to spin up a new EC2 instance you could do this by running some commands in the CLI or via the console manually. Infrastructure as code allows you to automate your infrastructure resulting in faster deployment times and standardization across your resources.
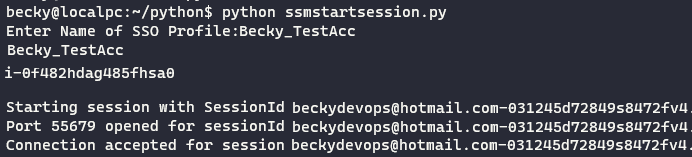
What is AWS2-Wrap? Well.. when your using AWS Single Sign On it's allows you to retrieve your AWS SSO credentials when trying to run specific commands.
Install Terraform Windows
1. Navigate to https://www.terraform.io/downloads.html and download the relevant installation file for your OS.
2. Create a directory on your local drive eg C:\Terraform
3. In your downloads folder find the terraform installation files> right click> extract all.. > point this to your newly created folder eg. C:\Terraform
4. Open your Start Menu and type in “environment” and click on the "Edit the System Environment Variables" option. This should pop up a system properties window and click the "Environment Variables.." button

5. Under System Variables you should see a variable named "Path" click edit> new> type in C:\Terraform> ok> ok

6. Open cmd and navigate to the the relevant terraform directory
CD \Terraformrun the following command to verify terraform has installed correctly
Terraform --versionwhich should return something like the below to show it has installed correct:

Install Terraform Linux
1. Run the following to add the GPG Key
$ curl -fsSL https://apt.releases.hashicorp.com/gpg | sudo apt-key add -2. Add the repo
$ sudo apt-add-repository "deb [arch=amd64] https://apt.releases.hashicorp.com $(lsb_release -cs) main"3. Update and install
sudo apt-get update && sudo apt-get install terraformInstall AWS2-Wrap
Pre-req:
AWS CLI is already installed and you have already added a profile you can find more about this here: https://docs.aws.amazon.com/cli/latest/userguide/cli-configure-sso.html
Python is already installed with pip you can find more about this here: https://pip.pypa.io/en/stable/installing/
Install visual studio code
Run the following command to install AWS2-Wrap
Sudo pip3 install aws2-wrapCreating an S3 Buckets with terraform
Ok so we've got the installation bit out the way now to get stuck into terraform! Programing language wise- terraform is written in GO. When you deploy a resource in terraform it keeps track of these resources with a state file. The easiest way i find is to get stuck in!
1. Make a directory for your files
mkd terraformtest2. Change into the directory
cd \terraformtest3. Type the following to launch visual studio code
code .4. Create a new file called s3bucket.tf (the .tf is the extension a terraform file uses)
5. Paste the following code into the file
provider "aws" {
  region = "eu-west-2"
}

resource "aws_s3_bucket" "example" {
  bucket = "becky-boardman-s3-terraform-bucket"
  acl = "private"
  versioning {
    enabled = true
  }

  tags = {
    Name        = "s3-terraform-bucket"
    Environment = "test"
  }


}
just to break down the above:
Provider: AWS (We need to create an S3 bucket so the provider is AWS)
Region: This is the region we want to launch the resource in set to EU-West-2 (London)
Resource: Displays what resources we want to deploy in this case an S3 bucket
Bucket which is part of the resource, this is the name we want to call the bucket
ACL set to private so our bucket will not be public
Versioning enabled is true so if anyone makes changes within the bucket we'll be able to see the different versions
Tags: custom tags you want to define in your bucket
press save.
6. The ‘terraform init’ command analyses the code in our terraform file and looks for the providers used within the code (in our case it’s AWS) this then downloads the relevant plugins which allow terraform to interact over an API. Run the following command within your terminal (you should still be in your terraform directory you made earlier)
terraform initThis should then bring back something like the below:

7. Terraform plan will show you in advance the changes you are going to make. So you have an idea of exactly what will be added, changed or removed. Make sure you set your profile to what has been configured via single sign on in this instance the Profile we intend to use is AWSAccount1. Run the following command:
aws2-wrap --profile AWSAccount1 --exec "terraform plan"
As you can see from the above output terraform advises one s3 bucket will be created. Nothing will be changed and nothing will be destroyed.
8. Next we are ready to deploy our S3 bucket! To do this we'll use Terraform apply. Using Terraform apply will deploy the relevant resources within our terraform code. In this use case it will create our S3 bucket in AWS. Run the following:
aws2-wrap --profile AWSAccount1 --exec "terraform apply"Once you run the command you'll need to review the plan and enter a value of "yes" to proceed as shown below

As you can see from the output this has created successfully after 3 seconds and returned an ID for the bucket
9. Go into the AWS Console and browse to S3 you'll see that our bucket has magically been created!

10. You'll notice as well if you return to your terminal and run the ls command you'll see a terraform.tfstate file which has been created. This state is used by Terraform to map real world resources to your configuration, keep track of metadata.

11. Say we don't want our S3 bucket anymore- how do we remove it from terraform? We'll use the command Terraform Destory. Once this command is run it will delete the S3 bucket from AWS
aws2-wrap --profile AWSAccount1 --exec "terraform destory"Once you run the command you'll need to review the plan and enter a value of "yes" to proceed as shown below

This might take a couple of minutes to disappear through the UI- but you will eventually see via the UI that the bucket no longer exists.
So there you have it: We've successfully created, deployed and removed an S3 Bucket via Terraform!


Comments